
This post is meant to be a light introduction into Python Flask. At the end of this post, you’ll be able to rapidly develop small web applications.
With some more learning, those apps will be enterprise-ready. The best of it? They’re natively built to run in containerized runtimes (like Docker, containerd, …) and the most available serverless platforms support the usage of Flask.
What is Flask?
Basically, Flask is a Python framework meant for web development. It provides you with libraries and technologies which allow you to build stable web applications in a very fast manner. This includes simple web pages, dynamic blogs or complex commercial websites. Flask itself has little dependencies to external libraries and comes with “batteries included”.
Pros and Cons of Flask
Flask is light. This is both a pro and a contra. Positively, you don’t need to worry about dependencies (and keeping them up-to-date) and watch for security bugs etc. - on the other side, this means that you will either need to work more by yourself to get the features you want, or search for and install libraries by yourself. The main dependencies of Flask are:
Werkzeug, which is a WGSI (Web Server Gateway Interface) library- this helps Python communicating with servers
jinja2, which is a templating engine- this enables you to write e.g. HTML templates which can be filled dynamically
Outlook: Templating
If you’ve ever worked with HTML or built your own website, you probably ran into the problem of keeping multiples pages in your website consistent. Templating makes this easy. Basically, you define your page layout once (think of a blog: There’s a layout for your home page, all blog posts look the same, …) and can use them infinite times.
You can not just define them once, but you can change them whenever you like and your whole website is still going to match!
Your First Web Application
Let’s stop the theoretic part and get our hands dirty. First, get up-to-date and install everything you need. It’s just two commands, so start your terminal (in this case, bash) and type:
  # update local repository and look for software upgrades
  $ sudo apt update && sudo apt upgrade -y
  # check if you have Python installed
  $ python3 --version
  # If it's not installed, go ahead with this:
  $ sudo apt install -y python3.8 python3-pip
  # Install Flask
  $ pip3 install flask
When you’re finished, start up by creating your first project directories:
  mkdir -p flask_projects/hello_world/{static,templates}
  cd flask_projects/hello_world/
Now open this directory in your favorite IDE (or if you like staying in terminal, use vim) and create a file called main.py which has the following content inside:
#!/usr/bin/env python3
# up there is a shebang, so you can execute the file and it will automatically run the users installed python3.x

# Import the flask module itself
import flask

# Instanciate the Flask app
app = flask.Flask(__name__)

@app.route('/')
def index():
    """ Displays the index at / """
    return flask.render_template('index.html')

if __name__ == '__main__':
    app.debug=True
    app.run()
Now in the sub-directory templates/, create a sample index.html file and paste the following:
<!DOCTYPE html>
<html lang='de'>
  <head>
    <meta charset="utf-8"/>
    <title>Hello world!</title>
    <link type="text/css" rel="stylesheet" href=""/>
  </head>
  <body>

Hello from <a href="https://torbentechblog.com">TorbenTechBlog</a>!

  </body>
</html>
Hit save, and from your terminal (or IDE) run the application:
  chmod +x main.py
  ./main.py
This is going to start your local webserver. Try to access it under http://localhost:5000 (the port may differ, it will be printed out on your log output on which port exactly the app is running).
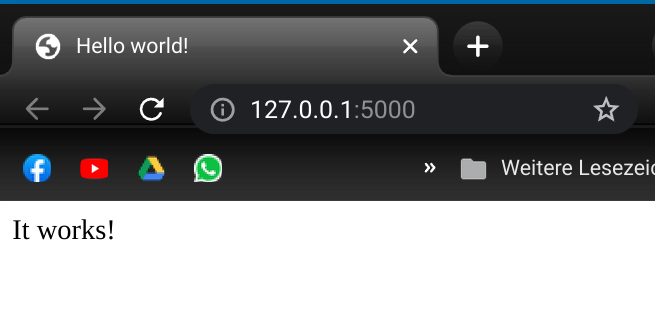
Congratulations, you just built your first web application with Flask and served some content!
You Promised Templating
Sure thing. In this section, I’ll show you a quick introduction to templating. It’s easy, free and fun!
When you opened up the browser last time, you saw “Hello from TorbenTechBlog”. Quite boring (not the blog, I heard it’s awesome), so let’s be more dynamic.
First, update the code to serve not only on / but also on /<name>. How do we do that? We simply add another route:
@app.route('/<name>/')
def hello(name):
    """ Displays a nice hello to whoever's there."""
    return flask.render_template('hello.html', name=name)
Create the following template hello.html to be served from your app:
<!DOCTYPE html>
  <html lang='de'>
  <head>
    <meta charset="utf-8"/>
    <title>Hello </title>
    <link type="text/css" rel="stylesheet" href=""/>
  </head>
  <body>
      Hello
  </body>
</html>
You know the drill, hit save and start your app.
When accessing http://localhost:5000/, you will still see the first page we’ve built. But when you access http://localhost:5000/Torben, you will see “Hello Torben”!
Templating Best Pactices
Did you see that we basically wrote two HTML files which have quite the same content inside? Yes, me too - by intention. The only thing that really changes on our two HTML sites are the HTML body and the title sections. They are both intended to use the same CSS (which, in our case, is non at the moment) and everything else is based on the same skeleton.
Let’s have a look at that, and start implementing a Flask best practice in templating.
Create a new master.html under templates/. This is going to be our - you guessed it - master template, from which we will derive our pages.
<!DOCTYPE html>
<html lang='de'>
  <head>
    <meta charset="utf-8"/>
    <title>{% block title %}{% endblock %} - Definitely not static!</title>
    <link type="text/css" rel="stylesheet" href="{{ url_for('static', filename='hello.css')}}"/>
  </head>
  <body>

{% block body %}{% endblock %}

  </body>
</html>
We just used some block definitions, which we will be able to fill dynamically. Watch out! Edit our index.html again and write the following:
{% extends "master.html" %}

{% block title %}Home{% endblock %}

{% block body %}
Hello there!
{% endblock %}
On the first block, title, we insert “Home” - it’s our Index/Home page at last. The body block is filled with “Hello there!”. Anything else is inherited by our precious master.html.
Now, we also want our hello.html file to shrink, so open it and type:
{% extends "master.html" %}

{% block title %}Hello{% endblock %}

{% block body %}
Hello, {{name}}!
{% endblock %}
Done! We just completely got rid of duplicated code and also started following best practices.
Addition: Dynamic Links
You often want pages to link to each other, e.g. link child pages back to your home page and vice-versa, or want some more advanced website headers to guide your users / customers through your website and link them to interesting stuff.
Implement the a HTML directive and use it like this:
<a href="{{ url_for('index') }}"><button>Home</button></a>
Flask will then automatically link you back to your home page via the button “Home”. Try it!
Conclusion
In this quick overview, you learned:
- What Flask is
- How to quickly write best practice HTML templates used by Flask
- How to write Flask routes in Python
- How to rapidly develop easy web servers